By Jonathan Soudry on Friday 28 June 2019, 17:08 - Permalink
This document has been created from the TP1 manufacturing data sheet produced by Alain BRIMONT.
MANUFACTURING METHOD
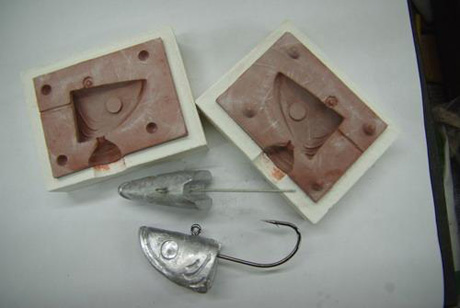
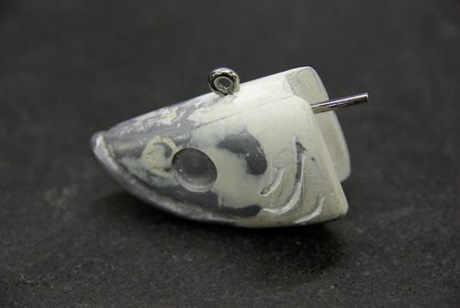
1 - leaded head
To make this mould you need a lure, here a 200g leaded head for large shads intended for deep-sea fishing.
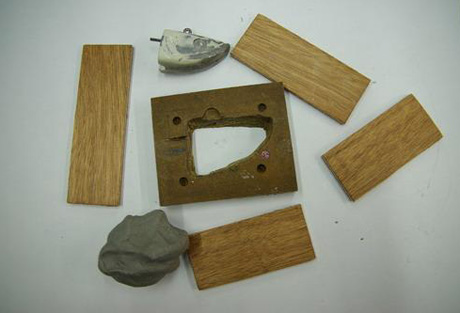
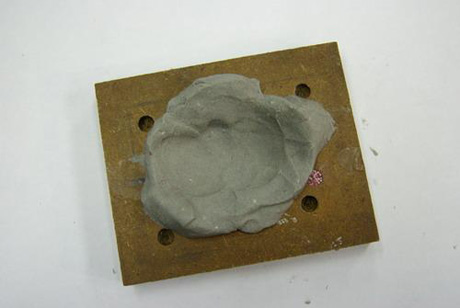
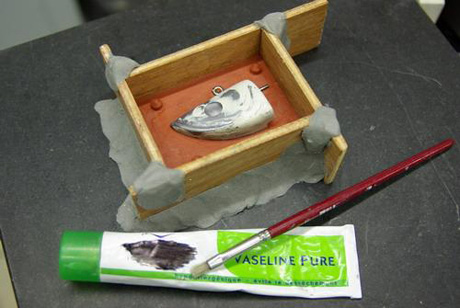
2 - realization of the box
The materials necessary to make the box in which the first RTV hull will be cast:
- a wooden base (medium, plywood, etc...) cut to the slightly enlarged shape of the master and drilled with 4 guide holes;
- plywood (CP) sides;
- Plastiline.
The wooden parts are hot-waxed for a better surface appearance and easier demoulding.
3 - the first half-shell
Place the Plastiline in the bottom and around the edge of the cut-out.
Insert the leaded head into the Plastiline.
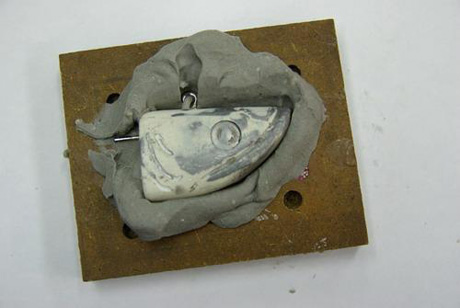
Cut, remove the excess Plastiline and adjust the height of the leaded head so that the parting line is in its middle position.
Clean the master and smooth the Plastiline with a brush soaked in F essence (hydrocarbon).
Ensure that the leaded head/Plastiline demarcation is as "clear" as possible.
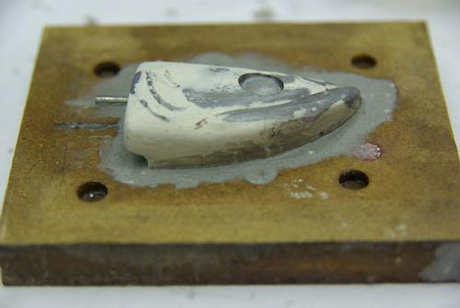
Mount the sides about 1 cm from the leaded head.
Seal with Plastiline or hot paraffin.

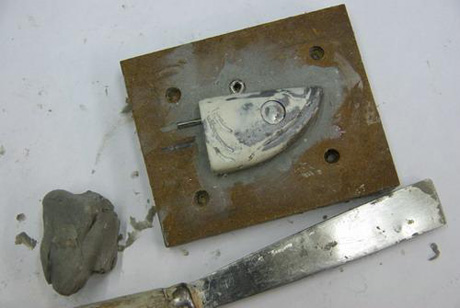
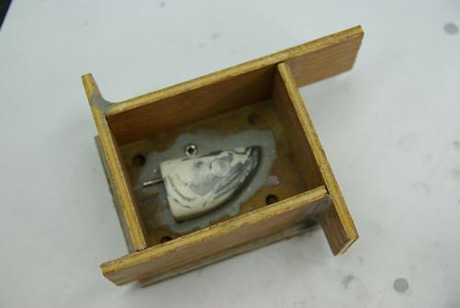
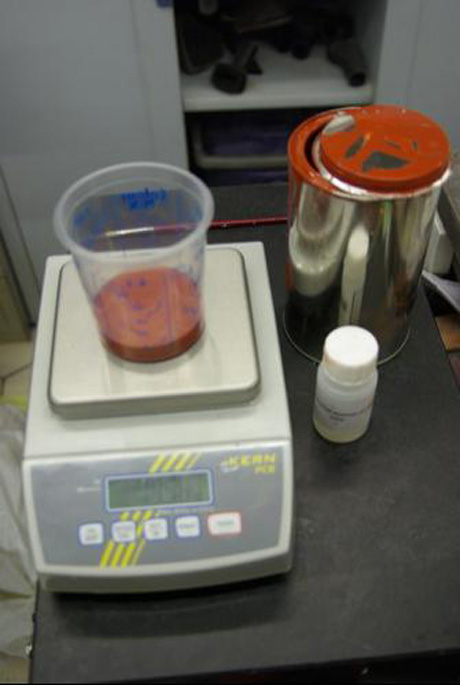
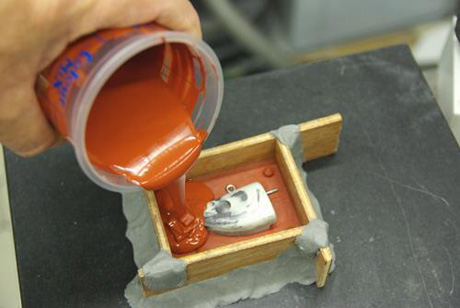
Prepare the necessary amount of RTV Lead by measuring the volume of the box (for height add +/- 7 mm to the thickness of the half leaded head) and consider a density of 1.5 for the RTV. Ignore the volume of the half leaded head, it will compensate for RTV losses on the container walls and mixing accessories.
After safely passing a thin layer of Vaseline (petroleum jelly) over the leaded head (essential if the master itself is made of silicone), the RTV is immediately poured by pouring it slowly into an angle of the box, so that it gradually wetting and covering the leaded head without including air bubbles.
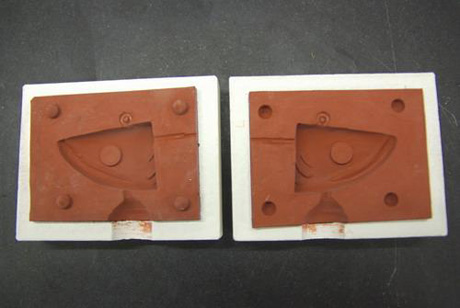
After hardening, the first half-shell is demoulded.
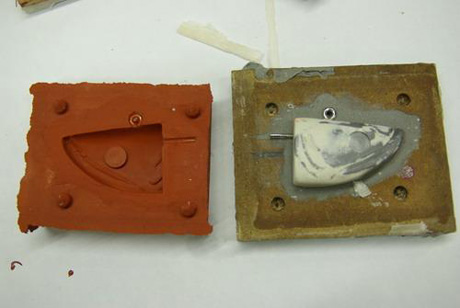
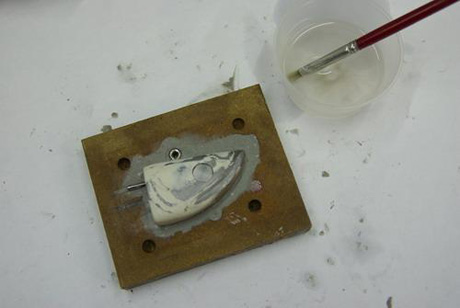
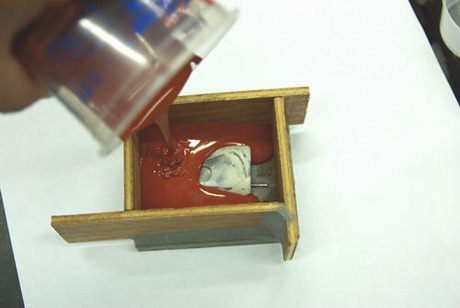
4 - the second half-shell
Coat the sides of the half-mould with Vaseline (petroleum jelly) and reform a box with the previously used pieces of CP, after removing the remaining paraffin and/or Plastiline. This time the assembly will be done with Plastiline, in order to maintain a certain pressure between the CP and the RTV. Then apply a thin layer of Vaseline (petroleum jelly) to the surface of the silicone, focusing on the CP/RTV and master/RTV junctions.
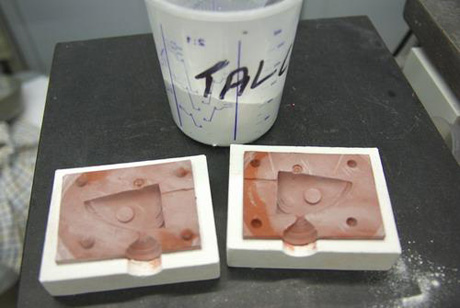
Prepare and pour the same quantity of RTV Silicone Lead.
Allow to cure and then remove from the mould.
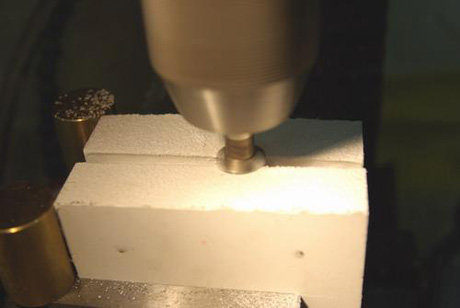
Drill a hole with a wood drill at the location chosen for filling (for a mold of this weight the diameter is 5mm).
As an option, a groove can be cut around the perimeter of each half-shell to hold them in the plaster reinforcement moulds.
For large molds (60/70g and over), it stiffens the RTV and prevents it from deforming when tightening the half-shells and during the casting of lead whose temperature causes the RTV to swell. However, you can replace these reinforcement shells with rigid plates that you place on either side of the mold before tightening the holding press. For moulds with lower volumes (up to 60g), their dimensions are such that the clamping press pads are generally large enough to obtain a more or less homogeneous pressure over the entire surface of the parting line.
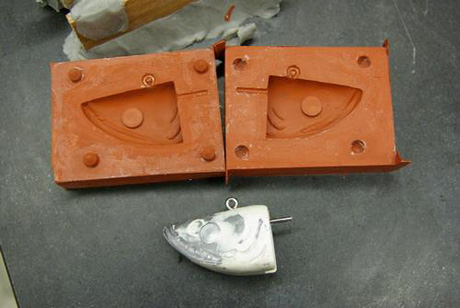
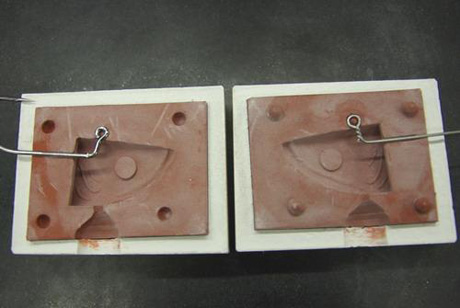
5 - assembling
After drying and cooling, assemble the 2 half-shells and mill the casting cone.
Extend the impressions of the hook shaft with fine bleeds, so that the lead does not flow during casting, if the hook is replaced by a thinner steel wire. The mold is ready.
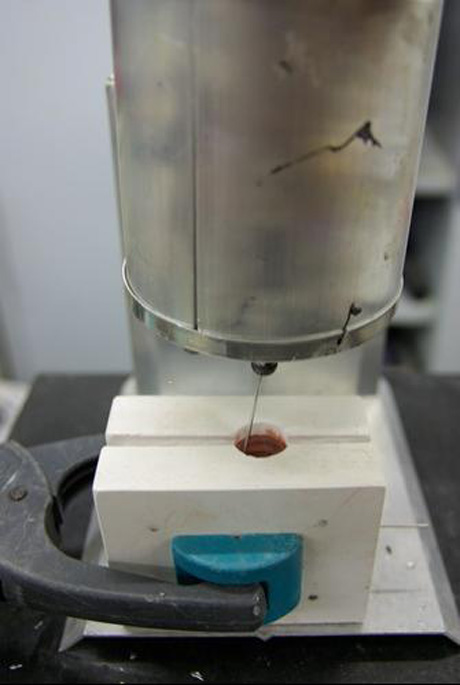
6 - lead casting
Carefully follow the impressions without forgetting the casting cones.
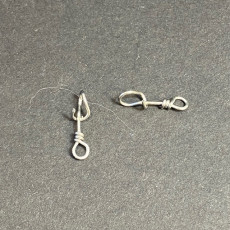
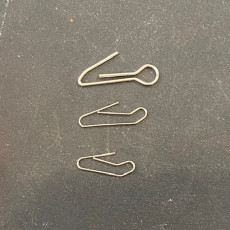
Set up the hook or steel wire (here in 140/100).
Keep the 2 half-shells in light pressure and pour the lead.
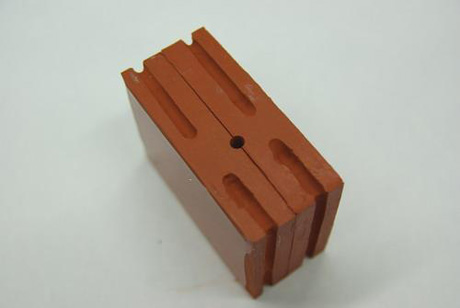
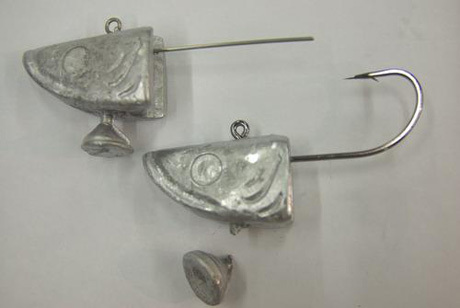
The results.
The condition of the mold after a few casts.